Best Starter Kit for Modern Calligraphy
So you’ve decided to take up the craft of modern calligraphy—hurrah! Calligraphy adds a touch of charm and elegance to any project and is a valuable art to add to your skill set.
Now you’re probably wondering, where do I begin? My recommendation: start off with the right tools for the job. You wouldn’t try to knit with a set of chopsticks and soggy noodles, would you?
Over the years I have tested many different products, and through much trial and error, I have arrived at some ultimate faves. These are tried-and-true materials I use in my everyday practice, as well as for professional pieces, and you’ll find them on other calligraphers’ fave lists too. They have also been included in the kits I’ve handed out to attendees of my calligraphy workshops.
Now let’s get right into it. These are the tools I’ve worked with for years that make up “The BEST Starter Kit for Modern Calligraphy”!
Tools For Your Calligraphy Starter Kit
First, we have nibs
The nib you choose is extremely important. If you choose the wrong type of nib, you’ll struggle to achieve the lines you’re attempting to create which will leave you frustrated and maybe a little discouraged… but it’s not you, it’s the nib.
Pointed dip nibs work with pressure applied to them; when you apply pressure, the stroke line thickens. The contrast in thickness varies depending on the nib model. These pointed nibs are what you’ll need for most modern calligraphy styles. The common alternative to pointed pen is broad edge nibs which produce Gothic, Blackletter, or Old English style calligraphy—the type of writing you might see from the middle ages or in traditional European documents. We won’t be covering those styles in this post.
My recommendations for starting with pointed nibs:
Why? These nibs hold a decent amount of ink and have semi to medium flex. For beginners, flex is important. These nibs maintain a reasonable degree of firmness in their tines, meaning they are less prone to break than delicate ones. High flexibility can also be difficult to manage for a beginner’s hand. Trust me when I say a strong flex can easily lead to messy pools of ink. While you’re still trying to figure out pressure exertion, the nibs listed here are very forgiving and manageable. The only downside: less flex in a nib equals less contrast in your stroke, i.e. the difference between thick and thin line weight is more subtle. Contrast is still achievable with these nibs, but less stark than others.
Next up: Nib holders
A nib holder obviously holds your nib, but the type of holder you choose depends on the style you’re looking to achieve and what feels best in your hand. As a modern calligrapher, you’ll want to use a pointed dip nib paired with a holder that can accommodate these nibs. You’ll also want the holder to feel comfortable and sturdy in your hands—after all, nobody wants to be sore and cramping after making art.
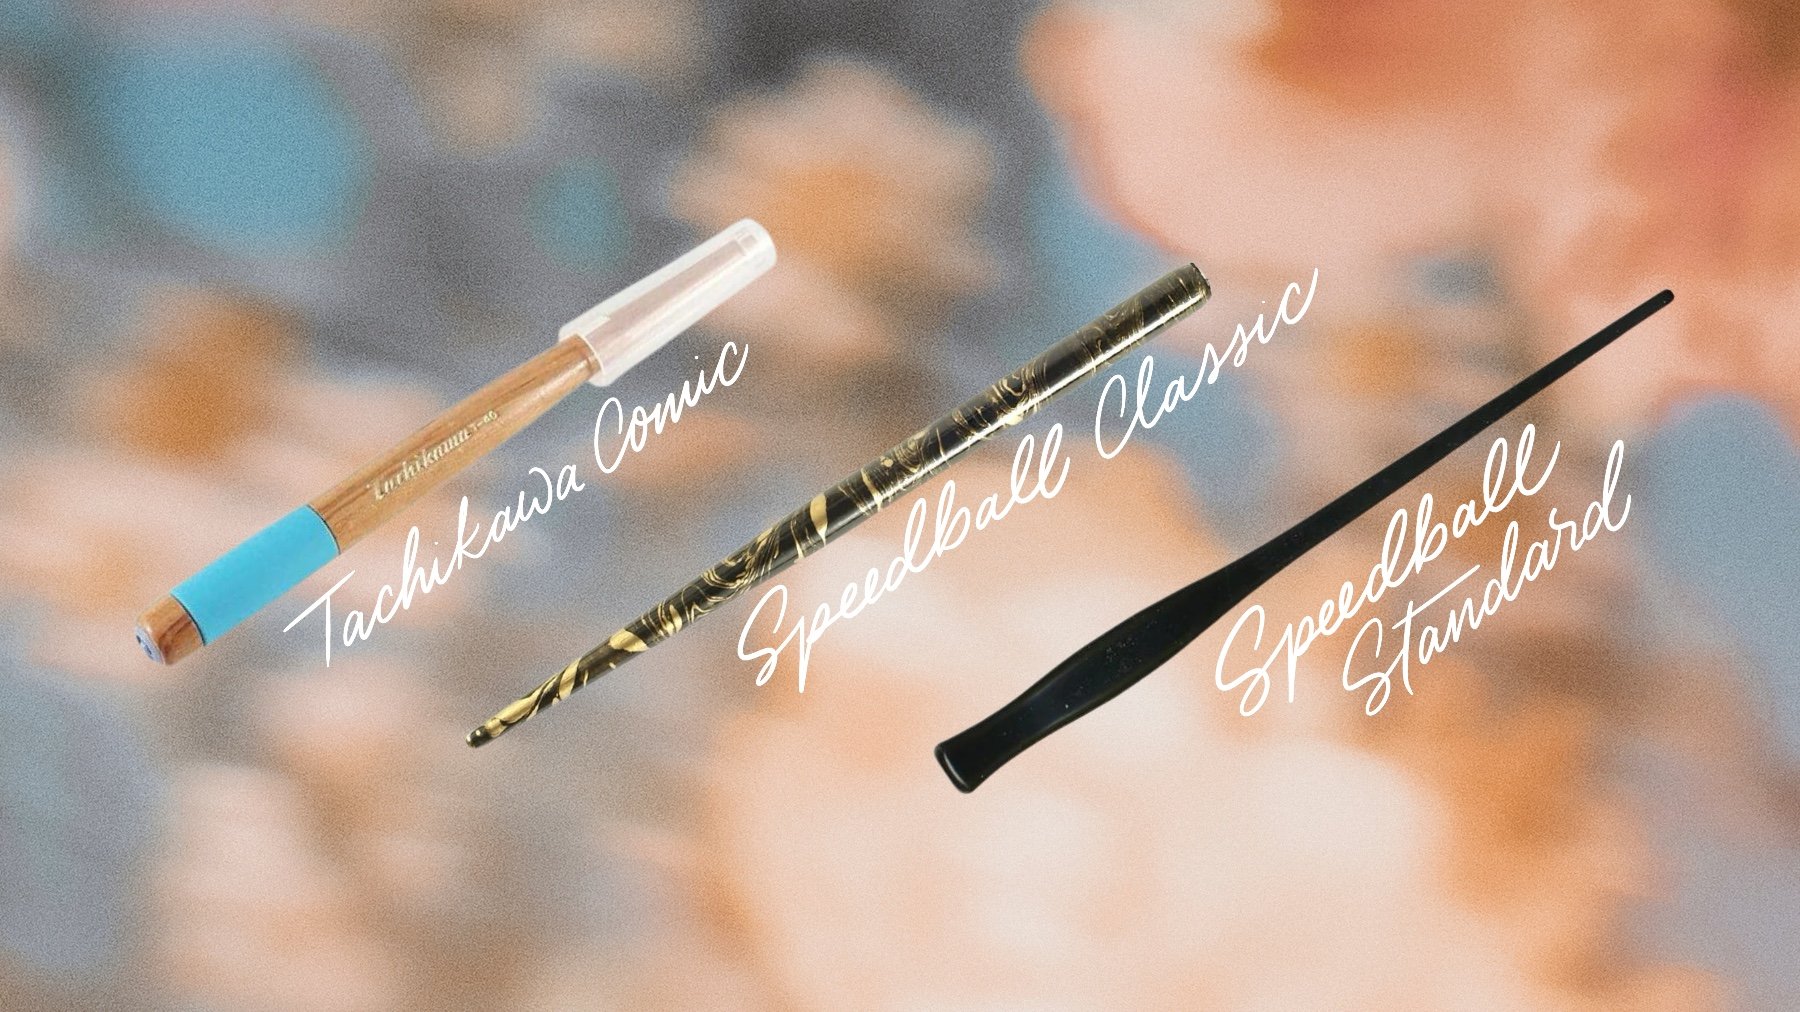
I recommend:
Why? These holders are pretty versatile in the nibs they can hold, especially when it comes to standard nibs. Speedball has been around for over 100 years and the Classic model is made of wood, available in mahogany matte finish, solid black, or a fun metallic marble finish (I have this gold one in my collection). They also have the Standard model in plastic with an hourglass shape for grip comfort. The Tachikawa Comic nib holder is made of wood with a rubber grip and nib cover. It’s a bit pricier, but I personally LOVE the extra bit of comfort the grip offers and the cap it comes with to protect your nib between uses.
Let’s talk ink
As you gain experience, you will most likely discover a few different inks that you fall in love with, as inks can be very personal in terms of preference. Not to mention all the beautiful colours and metallics you can be exposed to as you expand your practice!
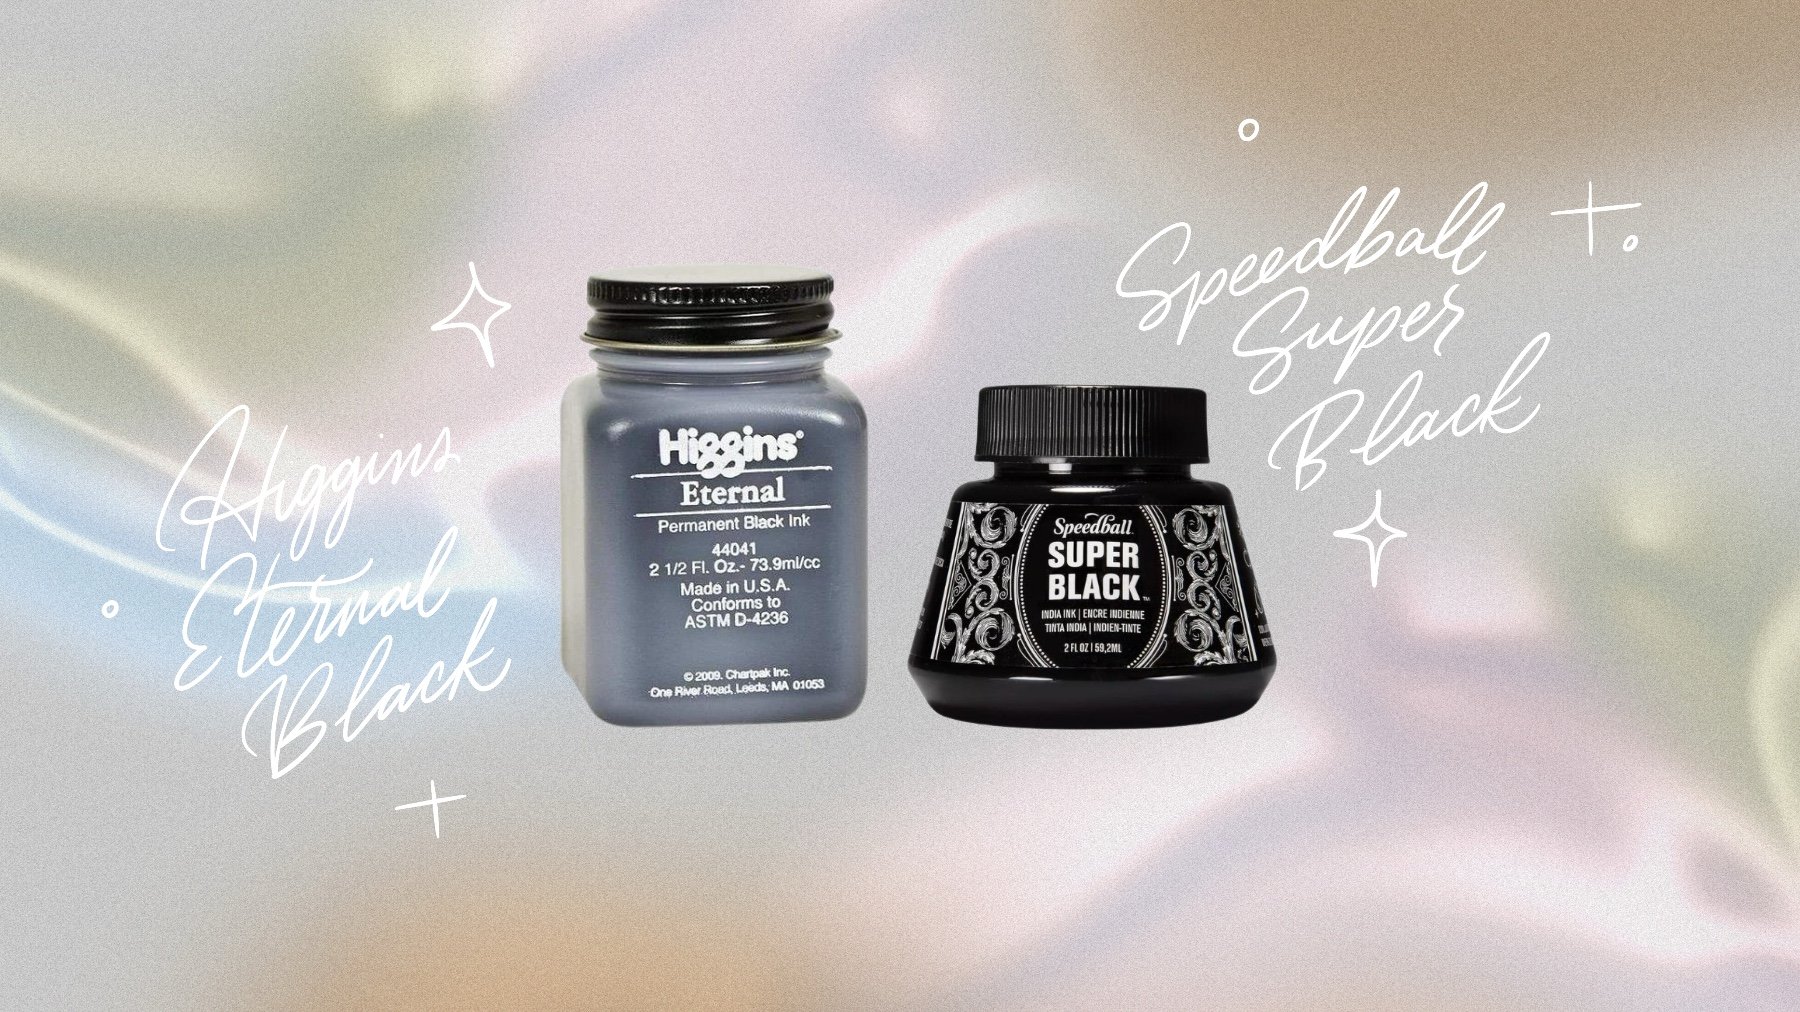
To start, I suggest using:
I recommend these two inks as they are both free-flowing, take well to a variety of nibs, and they dry with a nice matte finish. They are also very common and readily available at most supply stores for a reasonable price.
Finally, let’s put pen to paper… but which paper?
You might think using regular inkjet paper for your calligraphy will suffice. And you might just get lucky and everything will work out just fine. But just think of that time you ran into cheap toilet paper… Not pretty. If you don’t use a good quality paper, your other tools won’t perform properly.
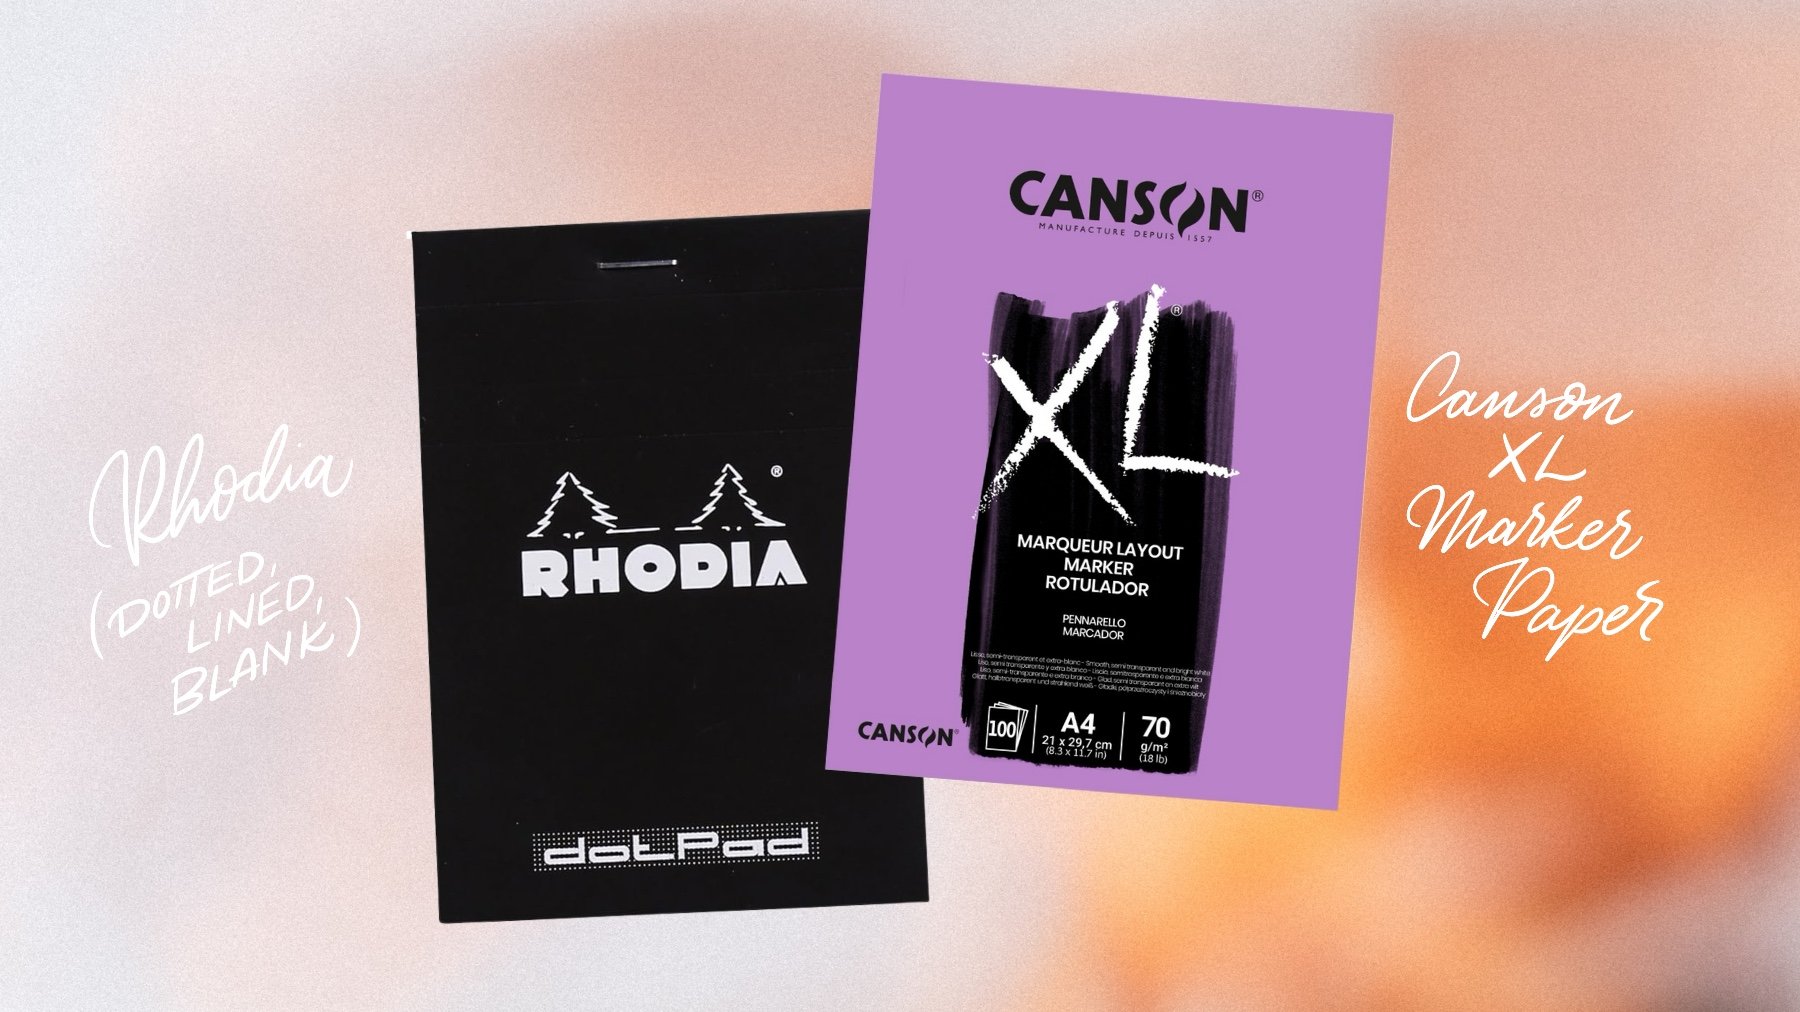
I recommend:
These papers allow your nib to run across them smoothly without catching and are thick enough so that the ink won’t bleed through. You can actually use both sides of the paper in these notebooks when you’re just practicing, which can ease your mind when it comes to the cost of the paper. Just make sure to allow the one side to dry fully first before flipping it over to write again.
Time to start dipping!
Those are the essentials. It’s as simple as that. Once you get started, you will eventually discover that each tool has its own personality and unique characteristics. When you’re ready to branch out and try new and different tools, you will realize that combining different nibs, inks, and papers can lead to new results—some surprising, some delightful, and some less desirable. Just remember to have fun with the process and don’t let a little challenge deter you.
Continue to experiment and problem solve when necessary. Ink too thick? Try troubleshooting—add a few drops of distilled water, or try a different paper and nib pairing. The possibilities are endless, just look for the clues and mix it up a little.
I’d love to hear your thoughts on the starter kit I’ve suggested in the comments below. Happy writing!
Recap: Best Starter Kit for Modern Calligraphy
Pointed Dip Nibs
Nib Holders
Inks
Paper


